
Snip, snip, snowflakes!

Lucky me… I went to the snow last week. The Victorian Alps are a winter wonderland at the moment and a stunning reminder of how varied and beautiful our natural environment can be. They were also a perfect inspiration for a simple and age-old craft that celebrates our chilliest season.
Snip, snip, snowflake… well, it’s almost that easy. Making paper snowflakes has been practiced by families for centuries, and used to decorate homes long before the days of tinsel and plastic. Its simplicity is deceptive… this activity covers a wide range of valuable learning concepts such as identifying shapes, counting, repetition and symmetry. It employs fine motor skills to manipulate paper, carefully folding, turning and pressing creases. And all that’s before the cutting even happens.
I really like the way this is an activity that can be kept simple for littlies, or extended for older children.
If your child is too little for scissors you can get them to decorate the paper squares first with crayons, pastels… and dazzle them with your magical adult scissor skills.
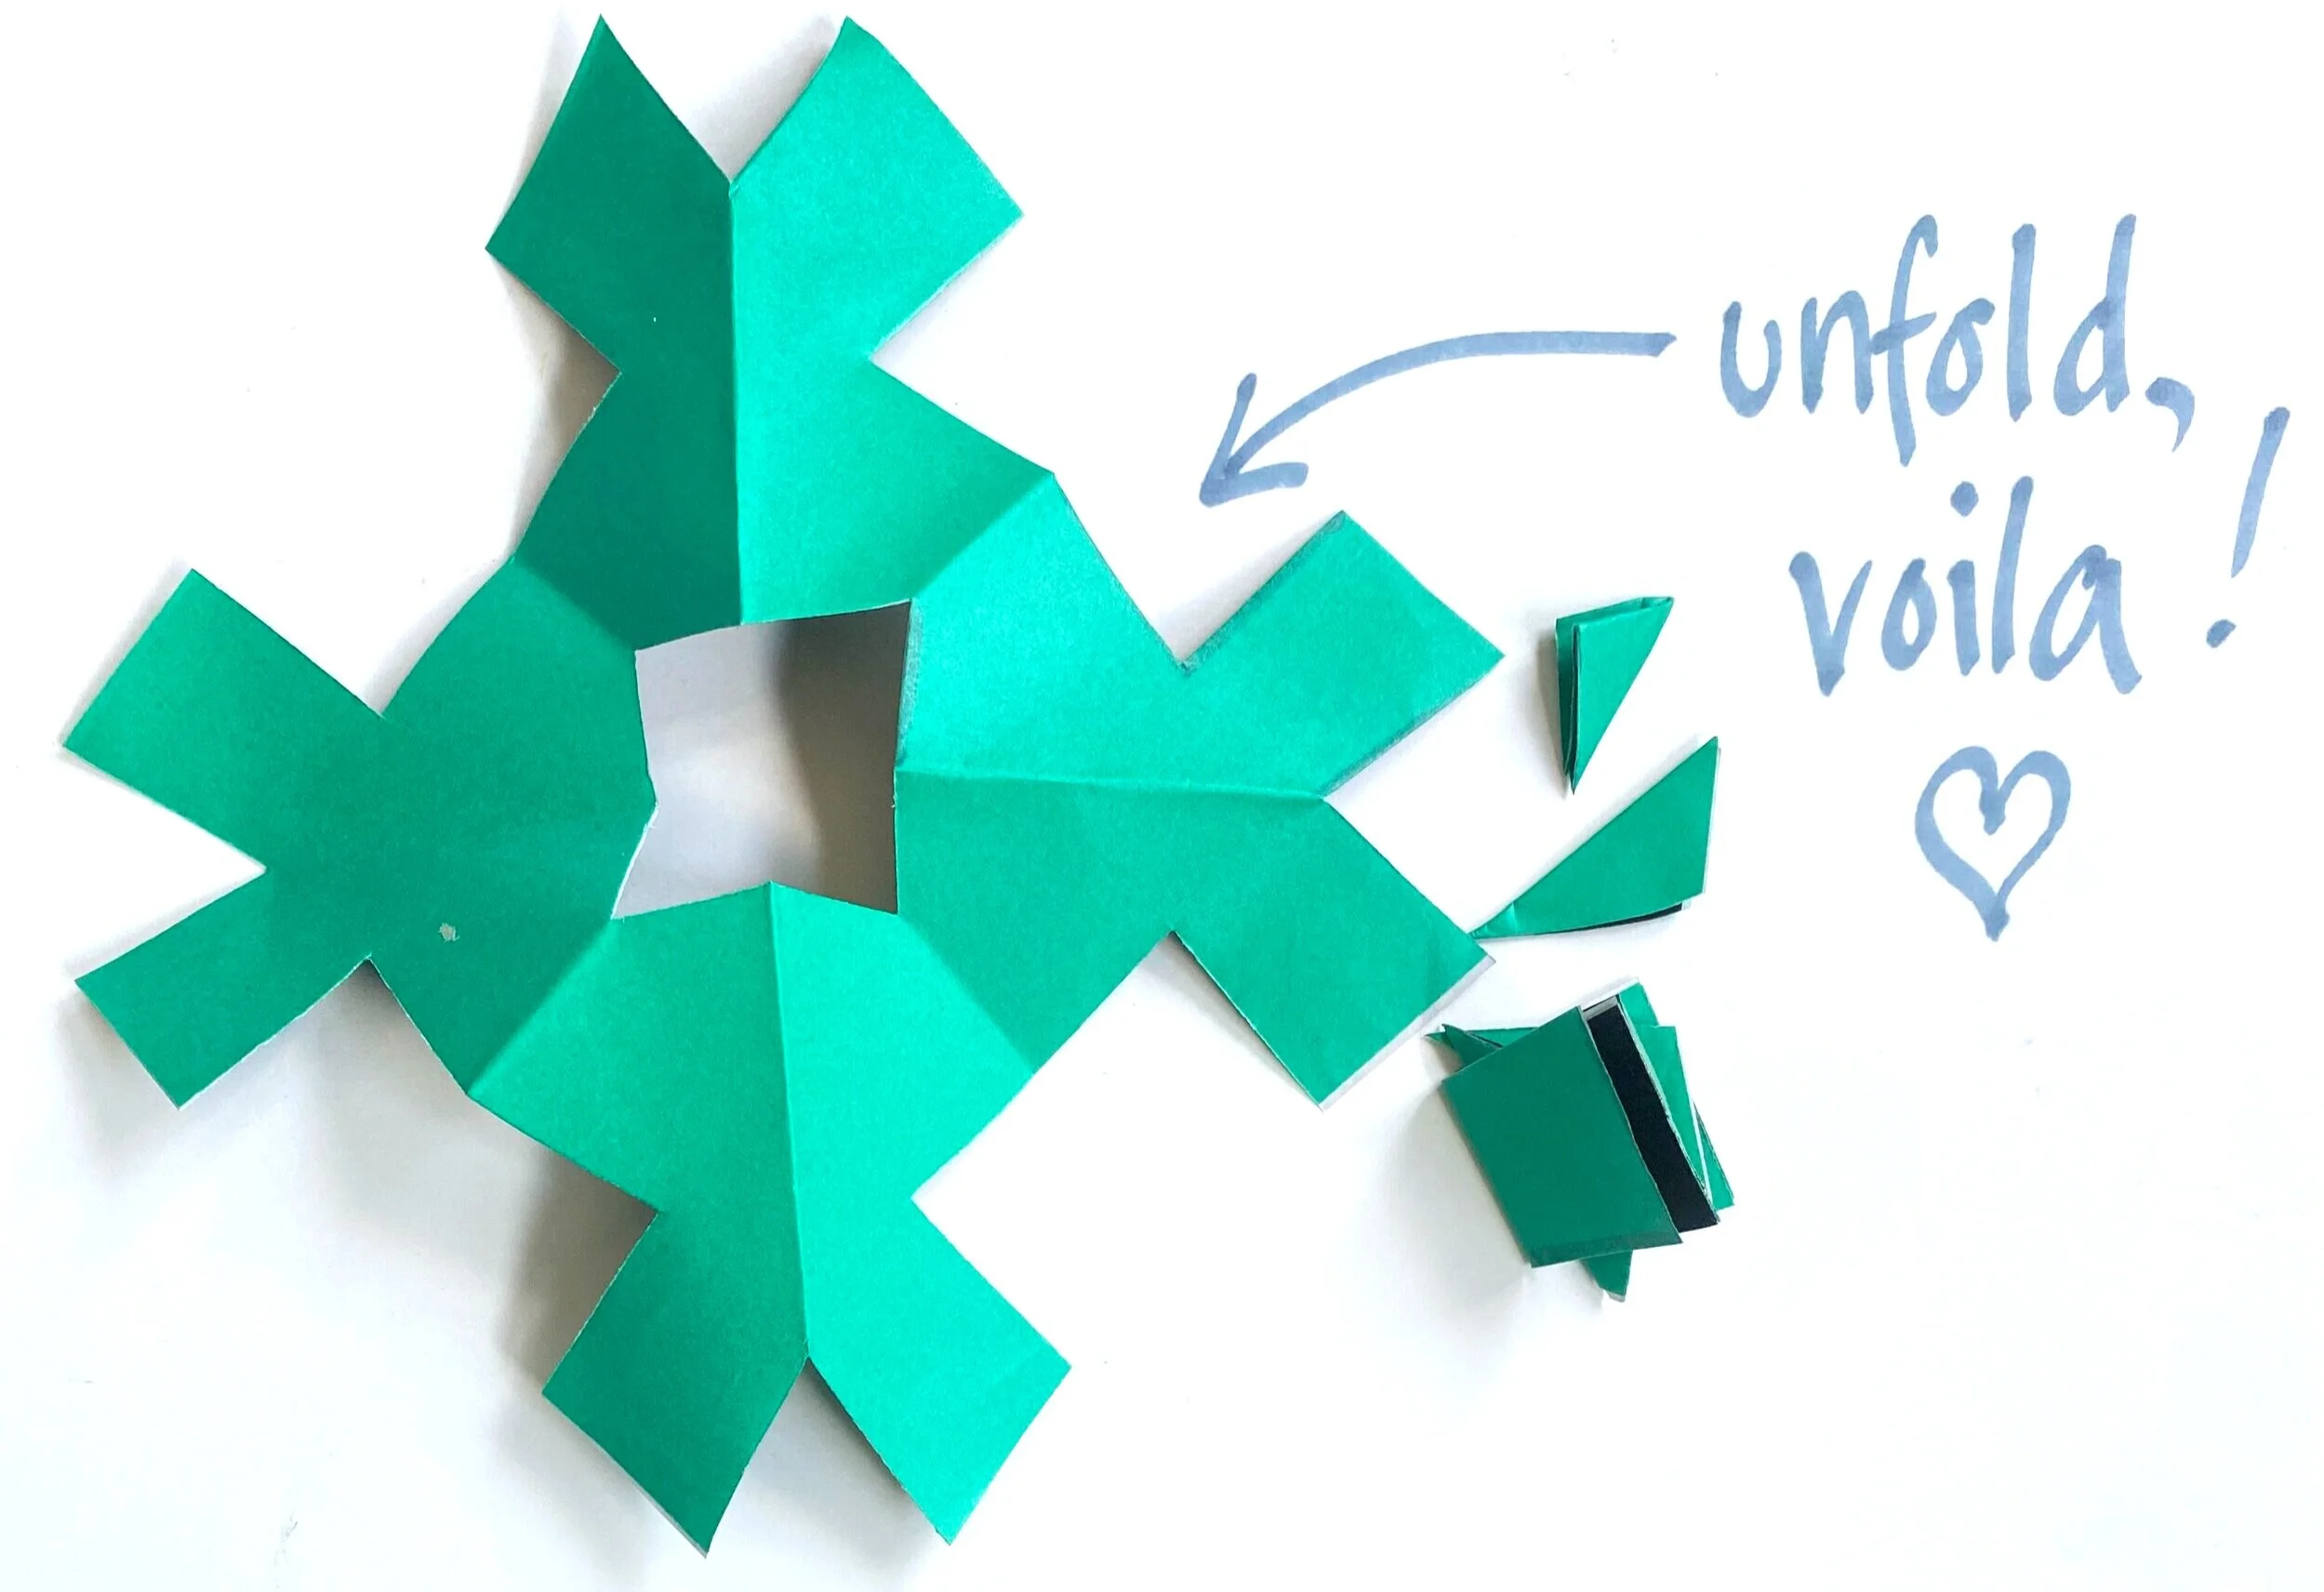
Older children can be invited to do the unfolding… just watch their delight as a snowflake appears.
And children who are developing their scissor skills will be amazed at the impact of just a few snips.
Your finished snowflakes look fabulous taped on windows, glued onto a contrasting coloured background, or decorating a greeting card. My children made so many that we stored the best in a display folder of plastic pockets.
How it’s done
To get started, you will need only two everyday things:

paper
scissors
The paper
Photocopy paper is great to use, just trim it into a square shape first. Kinder squares are ideal, but really you can experiment with any paper you might find around the house. Lightweight paper (wrapping or tissue paper) is easy to cut but can tear easily. Heavier paper is trickier to cut once folded but will make less fragile snowflakes. Try using junkmail, magazine pages, or old paintings from childcare.
The folding
Start simple: fold a paper square in half, and then in half again. Thick folds may be tricky for young cutters, but you can make beautiful snowflakes with a piece of paper folded just into quarters. Once you have mastered this, go further. Fold your squares into triangles, once, even twice. Real snowflakes have 6 sides… can you make one of those?
The cutting
Hold the centre of the square in your fingers, and cut into the edges. Two angled snips are enough to cut away a simple triangle from the edge, and that unfolds into a diamond.
I’ve added some simple instructions for a snowflake that begins with triangular folding. Have a go at making some of these with the children. Try folding starting with squares first, then triangles. Can you make 4-sided, 8-sided or even 6-sided shapes? Experiment, play… and most importantly, have fun being creative together!

Fold your paper square in half… here I’m making a triangle.

Repeat to make a smaller triangle.

Repeat again.

Simple snips can make great effects once unfolded. Here I’ve marked the 4 snips I made to create the snowflake below.